

DISASSEMBLY AND REASSEMBLY OF MIXING SHAFTS AND SEALS
1) DISASSEMBLY AND REASSEMBLY OF MIXING SHAFTS
If for reparation one or both mixing shafts have to be disassembled, insert supporting rafters under the axes
at the inside of the mixing tank and do as follows:
IMPORTANT: before starting any operation, make sure that in the main panel no alimentation voltage is present.
a) Check the phase of the mixing arms by taking a benchmark at the inside of the tank (for example the
position of an arm);
b) Disassemble arms and blades;
c) Disassemble the safety guards of the motor pulleys;
d) Disassemble the homokinetic joint;
e) Remove the belts and the pulleys;
f) Empty the reduction gears from oil:
g) Loosen the screws of the reduction gears;
h) For security reasons and for easing it out, hook the reduction gear to a lifting system
i) Remove the gearbox-support by slipping off the camping screws from the tank;
j) Disassemble the supports :
– remove the 4 nuts indicated by the red sign
– remove the 6 screws TCEI indicated by the blue sign

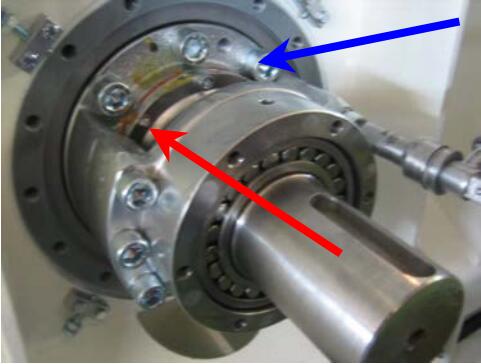
– slip out the complete support while the sealing rubber an
– d the locking device remain on the shaft

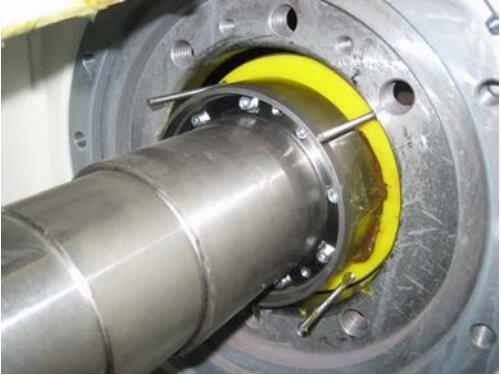
k) Remove the supporting pins from the shaft to be disassembled at the inside of the mixing tank and slip
the shaft out from the freer and easier side of the service platform taking care to disassemble the
distance pieces as soon as possible
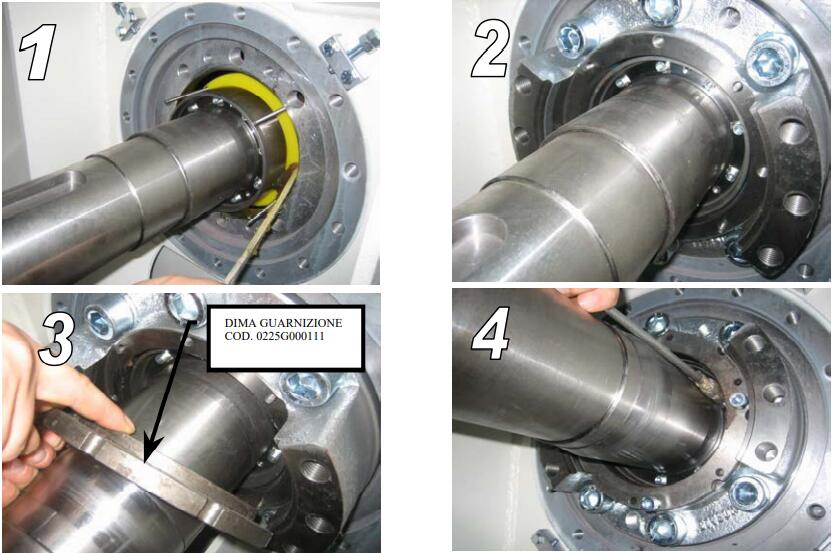
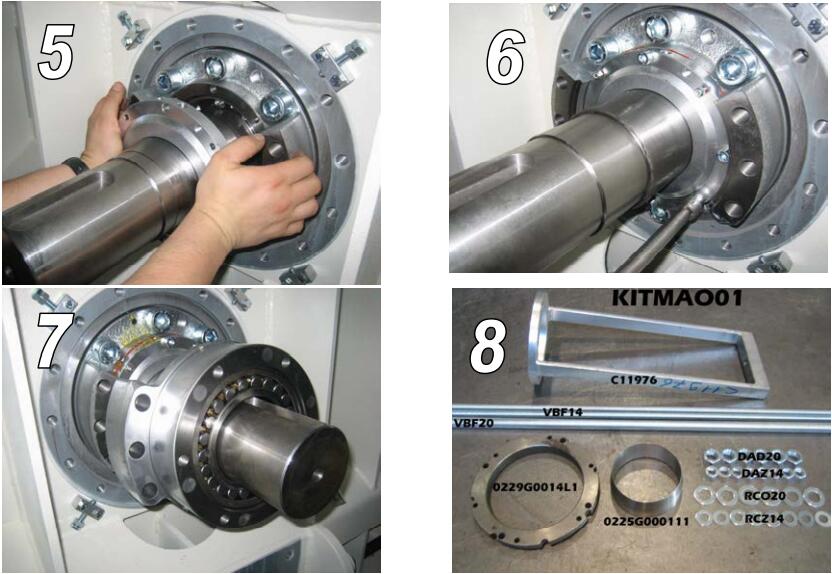
For reassembly do as above in reverse order, looking also to the following picture sequence.


the bearings in order to preserve the rectified seat of the bearing rings from shocks to the walls
of the mixer.